Where to Upload Html File Onto Google Cloud

Host a Static Website in Google Cloud with Cloud Storage
1. Introduction
Every pocket-size-business owner should have a domain name and website—they are the foundation of your brand and your method to communicate with potential customers.
Your domain proper noun and website are one of the primary ways that people find your business organisation, discover what products and services you lot offer, observe your contact details, and even transact business with you (e-commerce transactions).
If y'all're merely starting your concern now, so you're not expecting very much traffic, so you want to host a uncomplicated website. You lot can practice that in Google Deject, which makes the procedure very quick, easy, and inexpensive.
What you'll learn
- How to Create a CNAME tape
- How to signal that CNAME record to Cloud Storage
- How to create a Cloud Storage bucket named like your domain
- How to upload and set permissions on the static files for your website
- How to test your website
Prerequisites
- Y'all need to be the owner/administrator of your domain.
- Yous need a Google Business relationship.
2. Setup
Google Business relationship and new project
- If you don't already take a Google Account, then you must create 1. Sign into Deject Console and create a new project.


You can also edit the Project ID.
- Make sure that billing is enabled for your Google Cloud project. For more information, see Modify a Project'due south Billing Settings.
Domain ownership or admin rights
Equally mentioned in the prerequisites, you'll need a domain that you ain or manage.
If you lot don't have an existing domain, and then in that location are many services through which you tin register a new domain, such as Google Domains.
The following tutorial uses the domain www.cookingincloudhipster.com, which is managed through Google Domains and admin.google.com
- Verify that you own or manage the domain that you will utilise. Make sure that y'all are verifying the pinnacle-level domain, such as cookingincloudhipster.com, and non a subdomain, such as www.cookingincloudhipster.com.
Note: If you own the domain that yous are associating to a bucket, and then you might take already performed this step in the past. If yous purchased your domain through Google Domains, verification is automatic.
- Go to Google Search Console. Enter your domain proper noun and press keep.

- If you used Google Domains to purchase your domain name, then it volition let for automated ownership verification. However, if you're using another registrar, then you could accept a few more steps.

iii. Create a CNAME record
On the web, at that place are numerous systems that are used to make sure that you can get where you need to go. 1 of those critical systems is Domain Name Services (DNS), which helps with translating human-readable names like www.cookingincloudhipster.com into the numeric IP Accost number of the server that is hosting that website.
Within DNS, there is the power to add RECORDs to the DNS entry to aid other services with existence correctly configured. Some of the the common ones are MX or Post eXhange RECORDs, which help email systems piece of work.
In this section, you lot'll create a CNAME, which is a Canonical Name Tape or Alias Record record, so that when someone only enters cookingincloudhipster.com—without the "www"—it will even so lead to the correct server.
Follow these steps:
- Get to Google Domains. Click on the "My domains" task. If you need to Sign-in or if you are a starting time-time user, then use your email address to log in. Observe your domain— www.cookingincloudhipster.com.

- Click on "Manage," and so click "DNS."

- DNS Settings screen.
Toward the bottom, look for the "Custom resource records" panel.

- Add a CNAME tape. A CNAME tape is a type of DNS tape. It directs traffic that requests a URL from your domain to the resources that you want to serve. In this case, those are objects in your Deject Storage buckets. For more information, see CNAME redirects.
For world wide web.cookingincloudhipster.com, the CNAME record volition contain the following information:
| NAME | TYPE | Information |
| world wide web.cookingincloudhipster.com | CNAME | c.storage.googleapis.com |
When you lot're done, it should look like this:

4. Create a Cloud Storage Bucket
Adjacent, you lot'll create a Cloud Storage bucket to hold your static site files.
Follow these steps:
- Become to the Cloud Console. In the left-mitt carte du jour, scroll down to the STORAGE category and click on the Storage task.

- Click on Create Bucket.

- Complete the following fields:
- Name your bucket: Make certain that you proper name your bucket with your site name, which is www.cookingincloudhipster.com.
- Choose where to store your data: Select Multi-region so that the content is available from more than 1 deject region.
- Choose a default storage class for your data: Select Standard. For more information, encounter Storage classes.
- Choose how to control access to objects: Set the saucepan permissions for the whole saucepan and its contents the same. For information, see Access command lists (ACLs).


- Click Create.
So far in this codelab, you take been using the Cloud Console graphical user interface. However, you can as well command Google Cloud with Deject Crush, which provides you with command-line access to your deject resources directly from your browser.
This Debian-based virtual machine is loaded with all the development tools you'll demand. It offers a persistent 5GB home directory and runs in Google Cloud, profoundly enhancing network performance and authentication. This ways that all you will need for this codelab is a browser (aye, information technology works on a Chromebook).
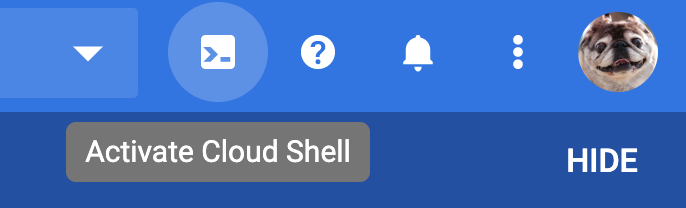
- To activate Cloud Shell from the Deject Panel, merely click Activate Deject Shell
(it should merely accept a few moments to provision and connect to the environment).
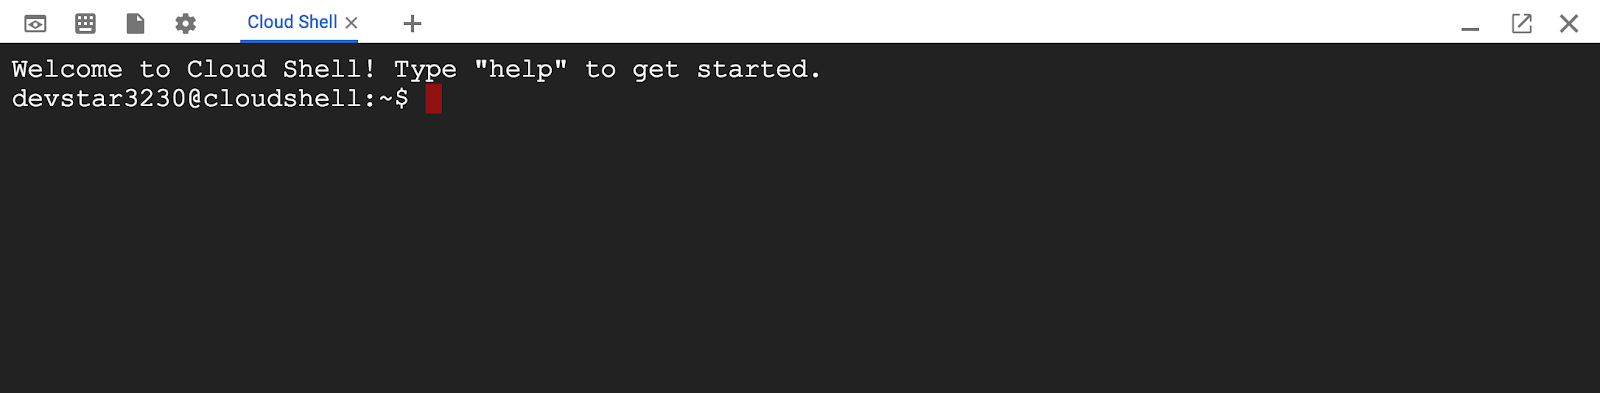
In one case continued to Cloud Shell, you should see that yous are already authenticated and that the project is already set to your PROJECT_ID.
gcloud auth list
Command output
Credentialed accounts: - <myaccount>@<mydomain>.com (agile)
gcloud config list projection
Command output
[core] project = <PROJECT_ID>
If, for some reason, the projection is not set, but consequence the following command:
gcloud config gear up projection <PROJECT_ID>
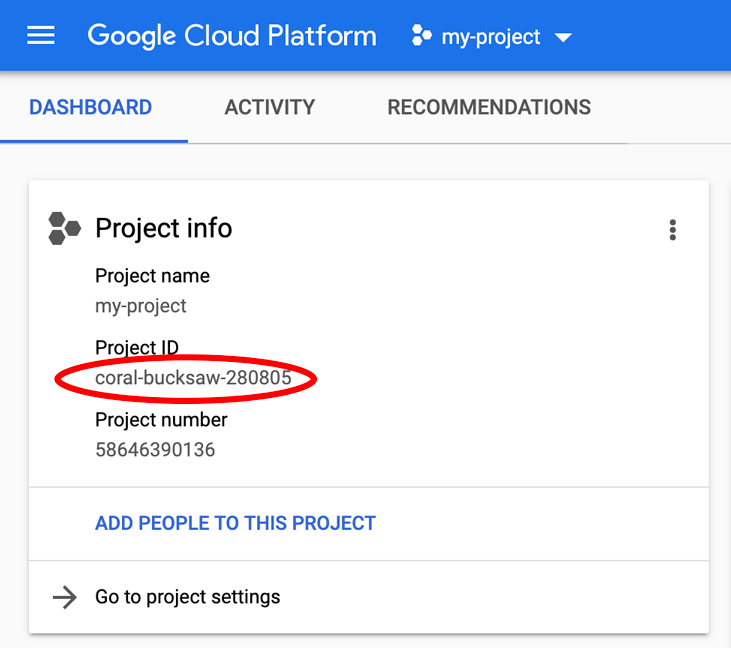
Looking for your PROJECT_ID? Cheque out what ID you used in the setup steps or await it up in the Deject Console dashboard:
Cloud Crush too sets some surroundings variables by default, which may be useful as yous run future commands.
echo $GOOGLE_CLOUD_PROJECT
Control output
<PROJECT_ID>
- Finally, set the default zone and project configuration.
gcloud config set compute/zone the states-central1-f
Yous can cull a diversity of dissimilar zones. For more than information, see Regions & Zones.
Hither'south the command-line version of "create bucket."
gsutil mb gs://www.cookingincloudhipster.com
5. Upload your website's files and images
Now, obtain the static files from your website developer or marketing squad. If you're doing it yourself, so there are plenty of nifty tutorials on HTML and CSS. Then, upload the static files into the bucket that yous created in ane of three ways.
Upload files with the Deject Console
- Become to the Cloud Console. In the left-hand menu, click on the STORAGE category, and then click Storage.

- Click on the bucket name, which is world wide web.cookingincloudhipster.com.

- Under Bucket details, click Upload folder.

- Upload your website'due south folders and files.

Upload files by dragging and dropping them
You can too upload files past dragging and dropping them.

Upload files using the gsutil rsync
You can besides the gsutil rsync command to copy big numbers of files from your local auto to Deject Storage. Yous can use the -R pick to recursively re-create directory trees. For example, to synchronize a local directory named local-dir with a bucket, use the following:
gsutil rsync -R local-dir gs://www.cookingincloudhipster.com
6. Set admission permissions
You can either brand all files in your bucket publicly accessible or gear up private objects to be accessible through your website. Generally, making all files in your bucket accessible is easier and faster.
If you cull to control the accessibility of individual files, so you can set up the default object ACL for your bucket so that subsequent files uploaded to your bucket are shared by default.
Bucket-level access permissions
Apply admission permission to the entire bucket as a whole. That is safer and, given that information technology is a static website, all of the contents likely need to be readable for the site to properly load. If y'all have some blueprint metadata (or hidden files similar .DS_Store, which is used on Macintosh, .is a file that stores custom attributes of its containing binder, such as the position of icons or the choice of a background image.) They tin can be individually subconscious or deleted.
- Click Saucepan details, then click Permissions.

- Click Add members.

- Add allUsers with Storage Object Viewer rights.

- Verify that you run into the following:

The files are now visible to the full general public. Hooray!
7. Edit website configuration
Now, the last step is to assign an alphabetize page suffix, which is controlled by the MainPageSuffix holding, and a custom error page, which is controlled by the NotFoundPage property. Assigning either is optional, simply without an index folio, naught is served when users access your top-level site, in this case— http://www.cookingincloudhipster.com/.
Alphabetize pages
An alphabetize folio (also called a webserver directory alphabetize) is a file served to visitors when they asking a URL that doesn't have an associated file. When you assign a MainPageSuffix, Cloud Storage looks for a file with that name and a prefix that matches the URL that the visitor requested.
For instance, say you prepare the MainPageSuffix of your static website to index.html. Additionally, say you take no file named directory in your saucepan www.cookingincloudhipster.com. In this state of affairs, if a user requests the URL http://www.cookingincloudhipster.com/directory, Deject Storage attempts to serve the file www.cookingincloudhipster.com/directory/index.html. If that file also doesn't exist, Deject Storage returns an error page.
The MainPageSuffix also controls the file served when users request the acme-level site. Continuing the to a higher place case, if a user requests http://www.cookingincloudhipster.com, Deject Storage attempts to serve the file www.cookingincloudhipster.com/index.html.
For more than information on the cases in which the index page is served, see Website configuration examples.
Error page
The error page is the file returned to visitors of your static site who asking a URL that does not represent to an existing file. If you take assigned a MainPageSuffix, then Cloud Storage only returns the fault page if there is neither a file with the requested proper name nor an applicable alphabetize folio.
When returning an mistake page, the HTTP response code is 404. The property that controls which file acts as the error page is NotFoundPage. If you don't fix NotFoundPage, then users receive a generic error page.


In the post-obit sample, the MainPageSuffix is gear up to index.html and NotFoundPage is set to 404.html:
gsutil web gear up -1000 index.html -e 404-Page.html gs://www.example.com
eight. Test your website
- Now, open a browser and go to your website— www.cookingincloudhipster.com.
- Ostend that you see the post-obit page and individual product pages:


Voila! It works and is available via HTTP.
Cleanup
Delete the post-obit Google Cloud resource:
- The Cloud Storage bucket
- The CNAME record
ix. Congratulations!
Yous created a static website and hosted it in Google Cloud!
Except as otherwise noted, the content of this page is licensed under the Creative Commons Attribution 4.0 License, and code samples are licensed under the Apache 2.0 License. For details, see the Google Developers Site Policies. Java is a registered trademark of Oracle and/or its affiliates.
Source: https://codelabs.developers.google.com/codelabs/cloud-webapp-hosting-gcs
0 Response to "Where to Upload Html File Onto Google Cloud"
Post a Comment